Focus and Auto Adjustment Modes
Regardless of the shooting mode, it is essential that you choose some type of setting in your camera to focus the scenes and subjects so that the lens works properly, making the correct reading of what is in evidence in the scene. Thus, there are two ways to use the focus of your objective: through manual mode, where the rotating ring remains in motion until you focus on what you are looking for, and autofocus (AF), or autofocus mode, in which the lens searches the scene area to focus on, based on your presets.
The manual focus mode is most effective for still photos or in low light conditions, while the autofocus modes offer more responsive possibilities for other types of scenes. The manual focus mode can be seen on the LCD screen to see if the subject is in focus or not, even allowing for magnifying the subjects and certifying the focus, but it is usually a slower process.
Most cameras offer a data crossing system that defines the type of focus that best fits each situation. As a rule, focus is possible when the lens visualizes contrast between the subjects to be photographed.
| Types of Focus | Focus and Auto Adjustment Modes
Regarding the movement of subjects, the types of focus are:
One Shot (Canon) or AF-S (Nikon) for still, motionless subjects;
AI Servant (Canon) or AF-C (Nikon) for moving subjects like people, animals and sports;
AI Focus (Canon) or AF-A (Nikon) Intelligent focus that adjusts according to the subject's movement variations, making it possible to vary the type of subject's speed in a short period of time.
When the camera works with the One Shot or AF-C type focus, it is possible to perform the image recomposition technique, in which the focus is read on a specific point (such as a person's eyes) and then, with the button
the shutter halfway and without releasing it, the entire scene is reframed. For other types of focus, this reframing technique is more difficult because it is movement reading. Photographer movement may confuse the camera with subject movement and it does not recognize the correct focus point.
| Focus Area Measurements | Focus and Auto Adjustment Modes
In order to take photographs with sharp focus, in addition to making it clear to the camera whether the subject is stationary or moving, it is necessary to consider which part of the image should deserve focus attention. So the focus area measurements are:
with 1 point (central or offset);
By zone where the focus area is defined by multiple points, central or displaced;
By automatic selection, where the camera will focus on all visible points of the subject, according to a self-assessment of what deserves to be highlighted in the scene. There are camera models with about 83 points
of autofocus.
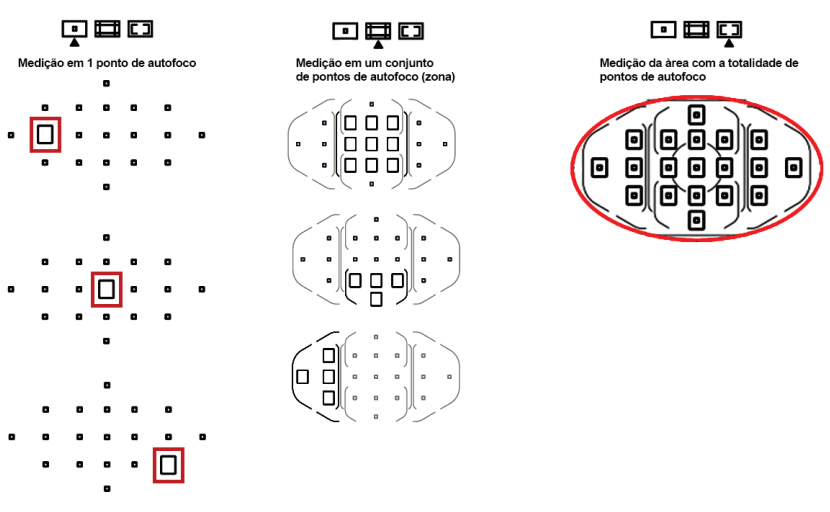
As with all resources in use in photography techniques, everything will depend on your preferences and types of subjects to be registered. In general, the single and central focus point is the most used in photography of people and isolated objects, as the focus reading is performed on a specific point such as the eyes and, after that, the scene is recomposed to full focus, depending on of your depth of field. Area or zone focus can also be used to capture groups of people or scenes with more information. However, the focus will not always be the exact spot you want to focus on. Focusing on the totality of points tends to confuse the camera, as there are many points to be seen by the lens, it may take longer and not focus correctly on the desired areas, blurring parts that should be sharp.
| Pre-Programmed Modes | Focus and Auto Adjustment Modes
Once you've chosen the type of focus for your lens to work as sharply as possible, it's time to get to know the camera's pre-programmed photography modes, which offer possibilities for balancing the exposure triangle, vibration and color temperature, lighting adjustment. location, among other factors such as using or canceling the flash. The intelligent reading system will define the choice of the best depth of field and even other points that you don't feel able to decide, when you train and know your equipment.
Although not present equally in all models of digital cameras, below, the adjustment modes present in most DSLR cameras, through a selector dial.
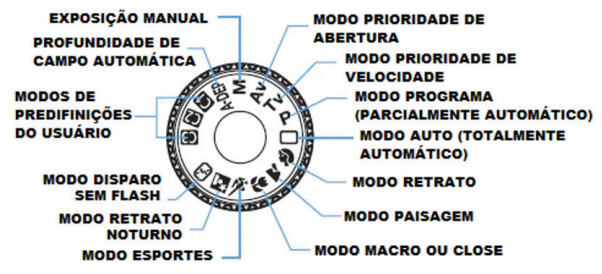
Different nomenclatures but equal functions
The representation icons for each mode can change from one manufacturer to another, however, most have the same types of presets. The amount of presets is also different for each type of camera, if we compare from the compact to the most sophisticated full-frame models.
The different modes of operation, mostly, refer to the set of resources that can be modified or not by the user, when obtaining records. Of course, the manual operation mode is one in which all adjustments are carried out as in an analog camera, combined until the record is obtained.
Auto exposure modes are: scene smart, or auto (or full auto), no flash, portrait, landscape, macro, sports, and night. Some cameras feature combinations of settings called special scenes, with guessing moments that require some specific adjustments. Some examples are: children, food, candlelight, night portrait, night scenes without the use of a tripod, backlit photography.
Intelligent Scene Mode (Auto, or Full Auto)
This is the mode used in the “point-and-shoot” system. Through this shooting mode, the camera takes full control of the light metering as well as the aperture, shutter speed and ISO considered by the camera as suitable for the situation in focus. It is also common in this mode to trigger the flash unintentionally to compensate for lighting. Just focus on the subject and shoot. Despite all the ease offered, the automatic mode does not offer adjustment possibilities, making your photograph a suitable scene for the standards determined by the camera, not by you. In this mode, the exposure triangle is controlled by the camera's light reading as soon as you point at the scene or subject.
Flashless mode
It has the same functionality as the automatic mode, however, the internal flash firing lock is already set. It is an ideal mode for photography beginners who use the automatic mode and need to make their records in places where the use of flash is not allowed, such as concerts, museums and art galleries, however, there is greater risk of losing the images because, in without the use of flash, the camera will compensate for the lack of light by reducing the shutter speed (which can lead to blurry photos) or by raising the ISO (which can lead to more grainy photos). Make sure you are holding the camera steady.
portrait mode
In this mode, your camera should prioritize the reduced depth of field, so the person in the foreground will be highlighted in the composition and the background will be more blurred, depending on the lens you are using. The aperture of the diaphragm should be used according to the maximum aperture of each objective (thus, an auto-mode portrait produced by an f/1.8 lens will have greater chances of a blurred background than a lens with a maximum aperture of f/4 . Also remember that the distance between the planes is decisive
for the blurred effect between the person and the background.

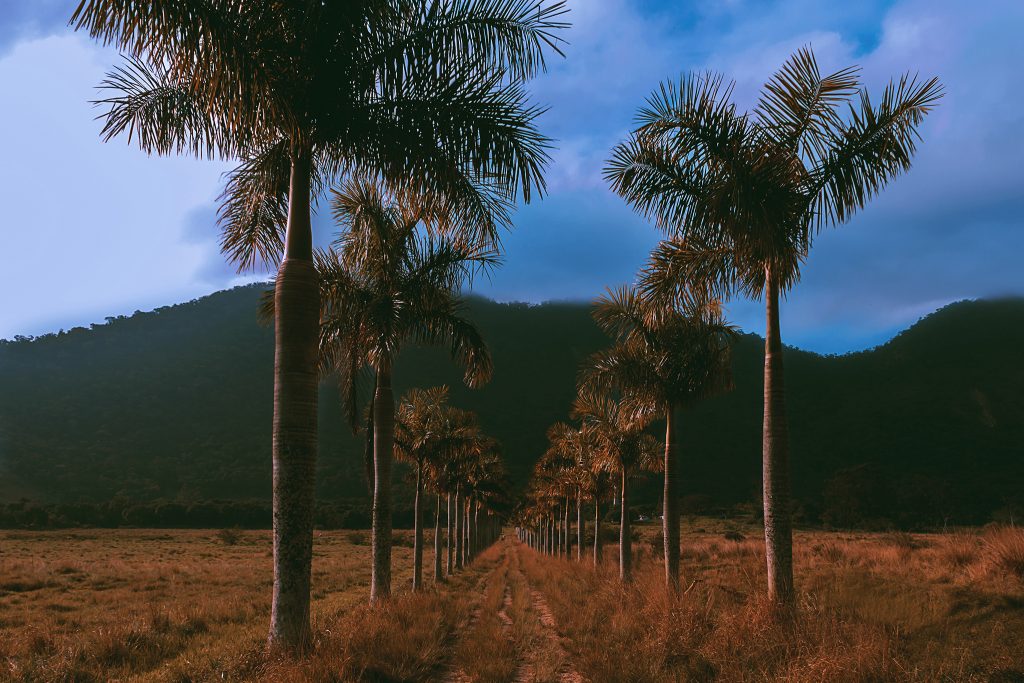
| Landscape or Nature Mode |
As opposed to portrait mode, the camera prioritizes closing the diaphragm to expand depth of field and bring all parts of a large scene into focus, where all subjects deserve equal attention. All steps of the triangle the camera controls from the reading of the subject, but, in this mode, the camera chooses to close the diaphragm (as opposed to portrait mode). With a smaller aperture, all parts of the scene will receive equal attention during the focus of the
record. This mode is used to photograph large groups of people, as it focuses on everyone at the time of shooting.
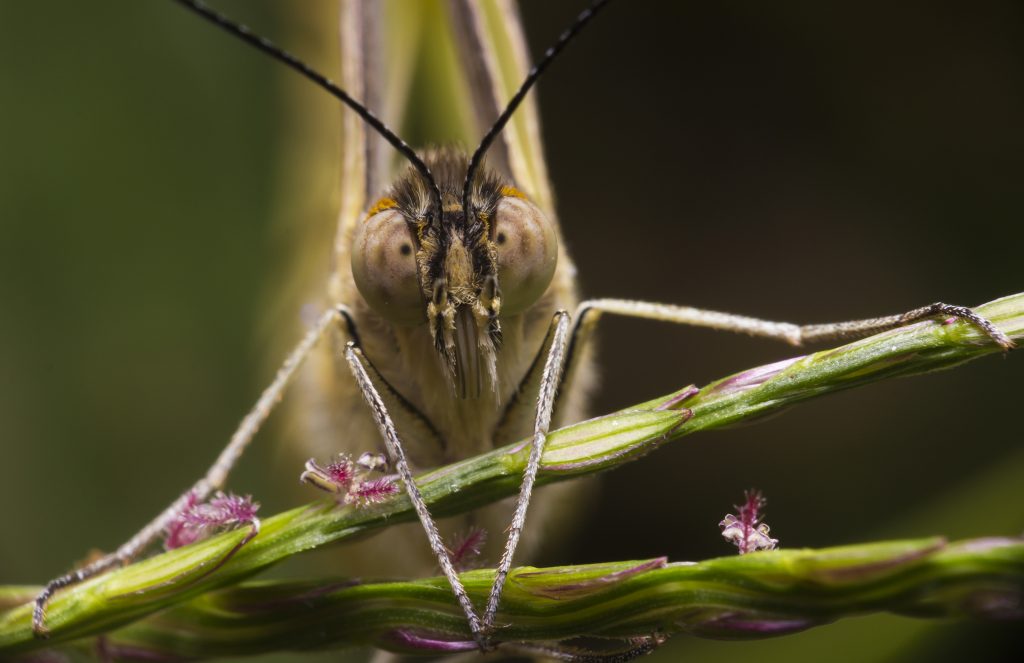
| Macro Mode |
In this mode, the camera understands that the object to be photographed is small, close to the lens and needs sharpness and precision in a small area, very close to the objective. Therefore, maintaining sharpness in this way is a task that requires attention, as the depth of field is reduced.
| Sports or Action Mode |
Mode that prioritizes exposure triangle combinations where the main objective is shutter speed, in order to freeze moving subjects. It is also used to photograph children, animals, among other non-static subjects.

Night or Night Scene Mode
Night shots demand more attention in shutter speed control, for longer exposure time, or, in ISO sensitivity, to extend the sensor's ability to record that scene. Therefore, in this mode, the camera reads the amount of light in the environment, checks the subject as a priority and establishes the best combination. However, in general, night shots tend to do better with slower shutter speeds, so using a stand or tripod is recommended. There may be automatic flash firing.
Other pre-programmed scene modes
Each manufacturer establishes the features that best fit their equipment, however, there may be diversified creative combinations, predicting scenes that occur in everyday life, or more restricted lighting situations.
Modes:
Scene with children or animals: Similar to sports mode, focus follows the child or animal in motion.
food: allows you to adjust the color temperature and enhance the dishes even more.
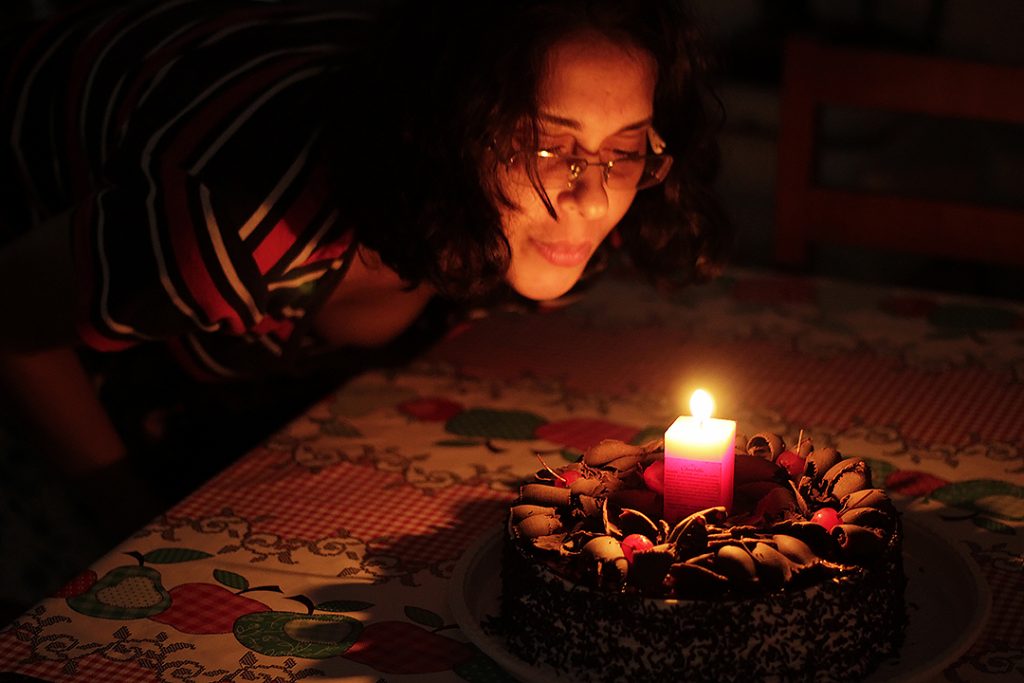
Candle light: photographs people in low light. It operates at reduced speed and may suffer from jitters. Also allows color temperature adjustment.
Fireworks: for moving bright spots in low light conditions.
Night portrait: used for portraits in backlit locations. It is also recommended to use a tripod or stand.
Against light: quickly combines 3 shots and results in a single image, for places where the subject is against the light source.
FORstreak or snow: the camera will carry out the correct balance of light colors contained in the image so that information is not lost due to excessive brightness contained in the scene.
Under water: only available for underwater equipment. The camera calculates the incidence of light through the water and makes the necessary adjustments.
Internal environment: the camera will automatically make the necessary white adjustments for the type of local lighting.
TIP:
Try each of the modes offered by your camera. So, manipulate as much as possible to know the features of each mode. Start indoors, with static objects, and test modes in different scenes, until you reach moving subjects and night scenes as well. That way, little by little you'll figure out what the best mode options are for each photography situation.
CONTINUED IN NEXT ARTICLE – Basic Photographic Technique (Part 12)
Anyway, we will meet in the next article on photographic technique.
So, you liked the article about Focus and Auto Adjustment Modes and want to contribute with a coffee of thanks? Make your contribution using the QR Code below. Help the Foto Blog that helps you. Any value is welcome! A coffee is R$2 here, for example.
Related articles
| | Make long exposure | | Types of cameras | | Light the principle (part 1) | | Light the principle (part 2) | |
Other links
| | Photo Accessories | | Focus and Auto Adjustment Modes | | Photography | | Online Gallery | | FotoBlog | | Photometry | | Photographic Technique || Color Photographic Technique | | Quality of a photo | | What is Photography? | | The Role of the Sensor | | Pricing | | Diaphragm Exposure Triangle | | Lens Types | |